이전 주차에서 데브스택을 이용해 Openstack을 설치해보았다.
처음 생각했던 구조는 다중 노드들에 각 서비스들을 설치하는 구조를 생각했지만, Devstack이 어떤 방식으로 Openstack을 설치하고, 각 서비스들을 어떻게 구성하는지 몰랐기 때문에 실패했다고 생각한다.
가이드라인에서 제시하는 stack.sh 및 주요 스크립트들을 분석하여 어떤 과정을 거쳐 각 서비스들을 설치하고 config를 구성하는지 알아보고자 한다.
# 주요 파일들
-rwxrwxr-x  1 stack stack  3302 Oct  9 06:34 clean.sh*
-rw-rw-r--  1 stack stack 32086 Oct  9 06:34 functions
-rw-rw-r--  1 stack stack 78033 Oct  9 06:34 functions-common
drwxrwxr-x  2 stack stack  4096 Oct 19 02:34 inc/
drwxrwxr-x  8 stack stack  4096 Oct 19 02:35 lib/
-rw-rw-r--  1 stack stack  1539 Oct  9 11:13 local.conf
-rw-rw-r--  1 stack stack  2700 Oct  9 06:34 openrc
-rwxrwxr-x  1 stack stack 47420 Oct  9 06:34 stack.sh*
-rw-rw-r--  1 stack stack 37514 Oct  9 06:37 stackrc
openrc
- devstack 은 환경변수를 계정에 맞게 설정해주는 openrc 라는 스크립트를 제공
- openrc 는 OpenStack 을 CLI 로 사용하기 위한 인증을 구성하는 스크립트
- 아래와 같이 입력하면 admin 계정으로 환경변수가 설정되어 CLI 를 이용할 수 있음
#source openrc admin
openrc로 환경변수를 export하지 않으면 해당 에러가 발생한다.
Missing value auth-url required for auth plugin password
어떤 환경변수를 export해주는지 알아본다.
- Configure a set of credentials for $PROJECT/$USERNAME:
- source openrc [username] [projectname] 와 같은 형태로 호출하면 사용자 username과 프로젝트 명으로 권한인증을 가져온다.
- 단 ADMIN_PASSWORD를 username에 맞게 넣어주어야한다. (local.conf)
- source openrc [username] [projectname] 와 같은 형태로 호출하면 사용자 username과 프로젝트 명으로 권한인증을 가져온다.
- function, local config, env, tls 스크립트를 가져오며 권한 인증에 필요한 정보들이 된다.
- env의 경우 stack.sh을 통해 오픈스택 설치 시 환경변수를 캐싱해놓은 파일이다.
# Find the other rc files
RC_DIR=$(cd $(dirname "${BASH_SOURCE:-$0}") && pwd)

# Import common functions
source $RC_DIR/functions

# Load local configuration
source $RC_DIR/stackrc

# Load the last env variables if available
if [[ -r $RC_DIR/.stackenv ]]; then
    source $RC_DIR/.stackenv
    export OS_CACERT
fi

# Get some necessary configuration
source $RC_DIR/lib/tls
3. 해당 스크립트로 load해온 정보를 export하는 과정
# Set the host API endpoint. This will default to HOST_IP if SERVICE_IP_VERSION
# is 4, else HOST_IPV6 if it's 6. SERVICE_HOST may also be used to specify the
# endpoint, which is convenient for some localrc configurations. Additionally,
# some exercises call Glance directly. On a single-node installation, Glance
# should be listening on a local IP address, depending on the setting of
# SERVICE_IP_VERSION. If its running elsewhere, it can be set here.
if [[ $SERVICE_IP_VERSION == 6 ]]; then
    HOST_IPV6=${HOST_IPV6:-::1}
    SERVICE_HOST=${SERVICE_HOST:-[$HOST_IPV6]}
    GLANCE_HOST=${GLANCE_HOST:-[$HOST_IPV6]}
else
    HOST_IP=${HOST_IP:-127.0.0.1}
    SERVICE_HOST=${SERVICE_HOST:-$HOST_IP}
    GLANCE_HOST=${GLANCE_HOST:-$HOST_IP}
fi

# If you don't have a working .stackenv, this is the backup position
KEYSTONE_BACKUP=$SERVICE_PROTOCOL://$SERVICE_HOST:5000
KEYSTONE_SERVICE_URI=${KEYSTONE_SERVICE_URI:-$KEYSTONE_BACKUP}

export OS_AUTH_URL=${OS_AUTH_URL:-$KEYSTONE_SERVICE_URI}

export OS_USER_DOMAIN_ID=${OS_USER_DOMAIN_ID:-"default"}
export OS_PROJECT_DOMAIN_ID=${OS_PROJECT_DOMAIN_ID:-"default"}

# Set OS_CACERT to a default CA certificate chain if it exists.
if [[ ! -v OS_CACERT ]] ; then
    DEFAULT_OS_CACERT=$INT_CA_DIR/ca-chain.pem
    # If the file does not exist, this may confuse preflight sanity checks
    if [ -e $DEFAULT_OS_CACERT ] ; then
        export OS_CACERT=$DEFAULT_OS_CACERT
    fi
fi

# Currently cinderclient needs you to specify the *volume api* version. This
# needs to match the config of your catalog returned by Keystone.
export CINDER_VERSION=${CINDER_VERSION:-3}
export OS_VOLUME_API_VERSION=${OS_VOLUME_API_VERSION:-$CINDER_VERSION}
functions, local config, env, tls 스크립트를 확인해보면 stack.sh에서 사용되는 환경변수, function들이 세팅되어있으며 stack.sh에서 호출하거나 변수로 사용하는 형태이며 stack.sh에서 좀 더 알아보도록 한다.
이외에도 stack.sh를 보면 아래의 디렉토리의 libraries를 활용하며 stack.sh을 읽으면서 모르는 function을 만나게되면 참고해볼 수 있다.

stack.sh
stack.sh의 일부를 발췌해왔으며 흐름을 이해하고자 한다.
- 라이브러리 디렉토리 체크
2. function과 service install function import, local.conf도 import (service 목록 등 import)

3. source $TOP_DIR/stackrc를 통해 service 목록, 각 서비스의 repo(설치받기 위한 저장소) 등록 등 import

4. lib에 있는 function들 import

5. 서비스 설치 전 enabled 서비스에 대해 환경변수 설정
# Swift
# -----

if is_service_enabled s-proxy; then
    # We only ask for Swift Hash if we have enabled swift service.
    # ``SWIFT_HASH`` is a random unique string for a swift cluster that
    # can never change.
    read_password SWIFT_HASH "ENTER A RANDOM SWIFT HASH."

    if [[ -z "$SWIFT_TEMPURL_KEY" ]] && [[ "$SWIFT_ENABLE_TEMPURLS" == "True" ]]; then
        read_password SWIFT_TEMPURL_KEY "ENTER A KEY FOR SWIFT TEMPURLS."
    fi
fi

# Save configuration values
save_stackenv $LINENO
여기서 사용하는 function이 function-commons에서 확인할 수 있었다.
#function-common

# is_service_enabled() checks if the service(s) specified as arguments are
# enabled by the user in ``ENABLED_SERVICES``.
#
# Multiple services specified as arguments are ``OR``'ed together; the test
# is a short-circuit boolean, i.	e it returns on the first match.
#
# There are special cases for some 'catch-all' services::
#   **nova** returns true if any service enabled start with **n-**
#   **cinder** returns true if any service enabled start with **c-**
#   **glance** returns true if any service enabled start with **g-**
#   **neutron** returns true if any service enabled start with **q-**
#   **swift** returns true if any service enabled start with **s-**
#   **trove** returns true if any service enabled start with **tr-**
#   For backward compatibility if we have **swift** in ENABLED_SERVICES all the
#   **s-** services will be enabled. This will be deprecated in the future.
#
# Uses global ``ENABLED_SERVICES``
# is_service_enabled service [service ...]
function is_service_enabled {
    local xtrace
    xtrace=$(set +o | grep xtrace)
    set +o xtrace

    local enabled=1
    local services=$@
    local service
    for service in ${services}; do
        [[ ,${ENABLED_SERVICES}, =~ ,${service}, ]] && enabled=0

        # Look for top-level 'enabled' function for this service
        if type is_${service}_enabled >/dev/null 2>&1; then
            # A function exists for this service, use it
            is_${service}_enabled && enabled=0
        fi

        # TODO(dtroyer): Remove these legacy special-cases after the is_XXX_enabled()
        #                are implemented

        [[ ${service} == n-cpu-* && ,${ENABLED_SERVICES} =~ ,"n-cpu" ]] && enabled=0
        [[ ${service} == "nova" && ,${ENABLED_SERVICES} =~ ,"n-" ]] && enabled=0
        [[ ${service} == "glance" && ,${ENABLED_SERVICES} =~ ,"g-" ]] && enabled=0
        [[ ${service} == "neutron" && ,${ENABLED_SERVICES} =~ ,"q-" ]] && enabled=0
        [[ ${service} == "trove" && ,${ENABLED_SERVICES} =~ ,"tr-" ]] && enabled=0
        [[ ${service} == "swift" && ,${ENABLED_SERVICES} =~ ,"s-" ]] && enabled=0
    done

    $xtrace
    return $enabled
}
해당 내용은 서비스가 enable한 서비스인지 판단하는데 사용되며, 0을 반환하여 enable임을 나타내고 있었다.
우리가 local.conf에서 넣어준 service 목록들이 해당 function을 통해 enable services에 등록되게 될 것이다.

마찬가지로 stack.sh에서 save_stackenv를 계속 호출하고 있었는데, 설정이 추가될 때 마다 친절하게 stackenv에 서비스 목록, 환경변수들을 캐싱하고 있었다.

6. 서비스 설치를 시작하기 전에 사전 환경을 세팅해놓는다.
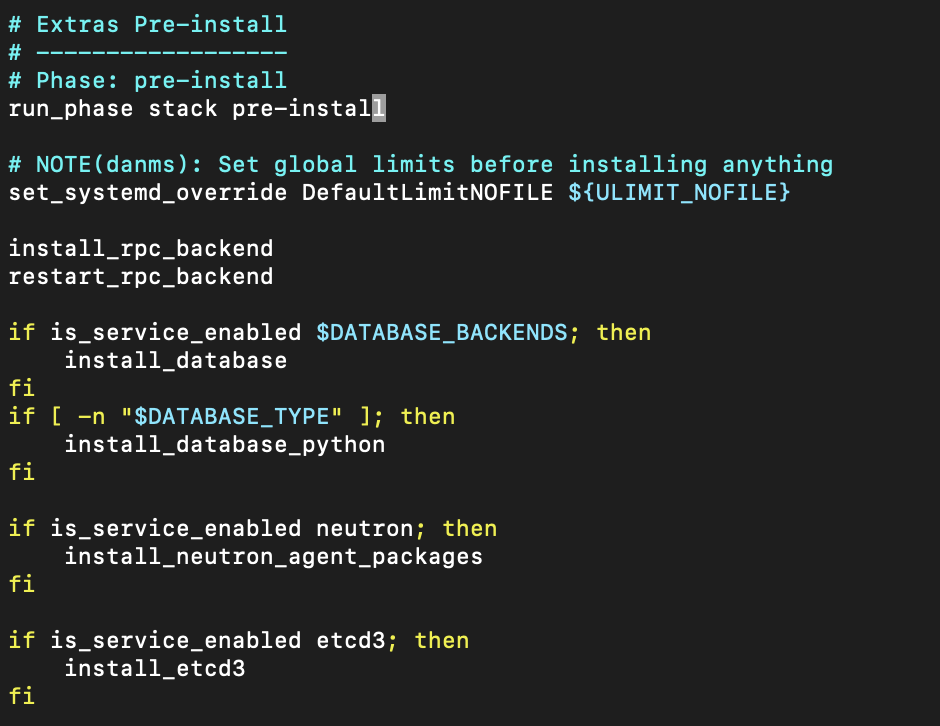
7. 설치 단계로 client단 부터 middleware 설치를 진행한다.

8. 서비스들을 순서대로 실행하기 시작한다. (enabled 목록에 있는 서비스만)

'Study' 카테고리의 다른 글
| [Linux] 모던 리눅스 교과서 3장 - 스크립트 (1) | 2024.11.17 |
|---|---|
| [Linux] 모던 리눅스 교과서 1,2장 (1) | 2024.11.10 |
| [Openstack] DevStack을 이용한 Openstack 설치 (1) | 2024.10.09 |
| [Openstack] 오픈스택 컴포넌트 이해2 (1) | 2024.09.25 |
| [Openstack] 오픈스택 컴포넌트 이해 (0) | 2024.09.18 |


